Skorne Chronicles, Vol 29
Three and Out
Since moving on from Zaal 2 a few weeks ago, I’ve picked up our second-newest caster and started messing with lists for him, and even getting a few games in. Thats right, I’m playing Hit Squad. I’ve talked a little bit about what I envisioned and how I was going to play him, as well as the first battle report. I’ve gotten two more games in with him now, and even though I’ve won all of them, I don’t think I’m actually going to play him much longer.
First, I’ll try and do a brief overview of both games, with a few pictures here and there. I managed to get three from each, though not the killing blow against Zaal 2 last night.
I used the same list throughout all three games, with varying results for each of its disparate parts. The strategic plan is the same each time – push the bulk of the enemy army into the waiting and joyous hands of my battlegroup, who wants to Trainwreck through everything and hope to break your back that way while also placing Morghoul in a position that if you flinch and get to close, he’ll stab your caster right good in the face for trying to participate. Game 1 that worked like a charm. I penned in Ol’ Goreshade the Cursed and got to him. Game two worked in a similar manner, but I think my buddy got in his own head a bit, forgetting about the zone in his attempts to remove both the Solider and the Bronzeback. Game three did not work at all like that, with Morghoul surviving a hair raising assassination run with just enough juice left in the tank to eek out with win.
The Midnight Bomber
The list:
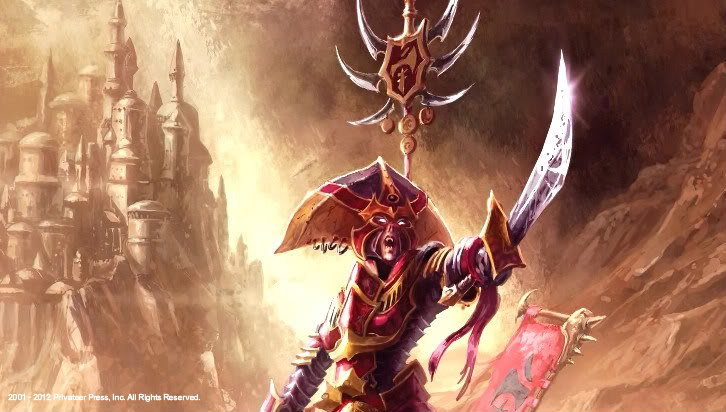
Lord Assassin Morghoul
-Aradus Soldier (8)
-Bronzeback Titan (9)
-Titan Gladiator (7)
Paingiver Bloodrunner Master Tormentor (2)
Paingiver Bloodrunner Master Tormentor (2)
Paingiver Bloodrunners (5)
Paingiver Bloodrunners (5)
Bog Trog Ambushers – Min (5)
Bog Trog Ambushers – Min (5)
Croak Raiders – Min (5)
Paingiver Beast Handlers – Max (3)
On Thursday, I played against a player using Hunters Grimm
Hunters Grimm
-Dire Troll Bomber (10)
-Troll Impaler (5)
Pyg Burrowers (6)
Trollkin Fenblades – Max + UA (10)
Trollkin Highwaymen (8)
Horgul Ironstrike
-Slag Troll (5)
-Slag Troll (5)
Trollkin Runebearer (2)
(Note – I’ve done a complete 180 on proxies, the storm troll in the picture is a slag troll, and I didn’t even think of it as anything else during the game)
This game was played on the below tables in the Recon scenario. I took the Effigy of Valor, and he took Fuel Cache. I won the roll and took first turn, deffering table edges to my opponent. I also denied his AD Burrowers due to Hit Squads tier. Neat.

As you can see in the picture, the Bog Trogs have come on the board, and are making a good go of it. After forgetting to use Silence of Death during the first game, it has come in mighty handy in the later two. Trolls and Nihilators don’t like it one bit.
The Ambushers have done exactly what I wanted them too, in terms of both their overall strategy and use, and the tactical execution on the board. Pathfinder and MAT 8 reach models are not to be underestimated, and can even take down targets hearty or dodgy with their CMA. In this game, with his burrowers underground on turn two, and the mass of Fenblades on my right, I had to commit everything. Both units of Ambushers, one behind the wall and the other behind the unit, and that flanks unit of Bloodrunners. With Shadow Step I was able to avoid the Set Defense rule by teleporting models that charged either behind or into a new model, thus avoiding the wording of the rule – Charge attack and Front Arc. The Trogs came in from either side and with reach were able to punch holes far enough into the lines to remove all but three. On the left I made the tragic mistake of getting to close to where the Burrowers were going to pop out, loosing that whole flank unit on my feat turn under is feat. I forgot, more than once, the Dodge rule of the feat, but it wasn’t on anyone I think had a chance of surviving. I also forgot how devastating Mortality is, including most of its benefits – like not being able to heal my Soldiers spirit.
Thankfully, the Bronzeback took enough shots to the face to spare the Solider an untimely death, while also posing a huge threat to Grimm, and as I said earlier, I was able to take it on scenario when he forgot to put some 6 or 7 of the Highwaymen in the zone.

I was feeling confident that game, but It was not mine by a long shot until the end there. He’d completely collapsed my left flank with the burrowers, blowing out what I thought was going to be a unit that might be able to get the drop on the burrowers. The gladiator was unharmed, but slow and behind the lines, while the soldier had only a few HP left to his name. While he clearly owned the left, I was holding the right without contest. Ambushers and Bloodrunners were dying, but not at a pace quick enough to benefit Grimm. I also clumped up my models turn one while running, and that ended very poorly for me, removing at least one Bloodrunner and loosing me half of the Croaks. It was a good, fun game.
The problem that I had, though, was that I wasn’t interested. Morghoul was sitting there, in the back of the army, doing nothing. His army didn’t even know he was there, for the most part. Well, that was what I thought, including about this next game, before a friend pointed out that simply by being Morghoul 2, you give the Bloodrunners Immunity to Free Strikes, Back Strikes, and CM/RA. That was absolutely critical in this game, preventing many of my Bloodrunners from being shot of the planet by a barrage of gunfire.
Mirror, Mirror
The next game, this one against the Below Zaal 2 list, would be the opposite experience. This Zaal 2 list is one that I’ve helped spitball, and it has some pretty mean teeth
Zaal, Ancestral Advocate
– Cyclops Raider (5)
– Cyclops Shaman (5)
– Basilisk Krea (4)
Agonizer (2)
Tyrant Commander and Standard (3)
Venator Slingers – Max (6)
Praetorian Keltarii – Max (8)
Nihilators – Max (8)
Pain Giver Beast Handlers – Min (2)
Ancestral Guardian x3
Hakaar the Destroyer
We played on the below board using Fire support. I had the Arcane Wonder again, and he had Effigy of Valor. Once again I won the roll off, and once again I took first turn.

In deployment and on turn two, I made an extremely costly blunder. I’ve committed to the left zone in my head. Trogs are going to come in and eat up the back side of whatever tries to pass the trees, and the bloodrunners and beasts would come in from the front. Looking at the board later on in the game, the building made it exceptionally hard for my opponent to contest the right zone, and I should have worked to take control of that on turn 2, and hold it for the rest of the game. One of the things I know I wasn’t good at 8 months ago was scenario play. I’ve gotten a lot better at it, but sometimes the finer points escape me. At least I am playing to the scenario now, instead of shying away from it and just barely trying to stop it from happening.
This game progressed brutally, and Transference did a ton of work gutting, once again, the left side. While I was able to get Silence of Death out onto the white Bloodrunners, and was able to pick apart the Nihlators, I wasn’t able to kill them all. They do a ton of work with Zaal. That did jam up the Keltarii, being surrounded by bodies, and prevented them from really getting over to Morghoul 2.The Soldier was committed to early, unable to really get to Hakaar early enough to kill him, and the Bronzeback was nullified the following turn by a brilliant set of moves including Sunders Spirit, Spiritual Paralysis, and Gnawing Pain. Unable to charge, slam, trample or use his animus, while at -2 Strength while under Zaals feat made it very, very hard to make a good decision about what to do. In the end, my P+S 15 went against the objective, killing it in four attacks (note: we forgot Zaals feat, but I then used 4 fury to do no damage to hakaar) I then attempted, unwisely, to kill an AG under Zaals Feat. The foolish move opened me up to a blistering barrage of Soul-fueled Sunder spirits, which I was barely able to whether due to a number of circumstances, not the least of which was the Raider advancing and shooting me prior to moving the AG out of combat. Zaal 2 then hunkered up, but it was too late. with 5 health left and 1 fury, I cut down to one HP and, after having the path cleared, charged in. It was extremely tight, with only a single fury remaining after the kill.

Lashings
At the end of the day, though I won both games, I didn’t really feel in any sort of control of the game. Morghoul, for my taste, just doen’t provide enough anything to his army. His spell list is lack-luster, though the times when Silence of Death comes into play it is a glorious site. Ghostwalk I’ve never even cast, and flashing blade is adorable, but seems to have a very limited application (Tosses from a Mammoth). His feat is extremely low powered and combined with a low control area feels extremely bad. I’d almost honestly have preferred Morghoul to have +2 def and Dodge, and pull the feat off his card. His personal threat range is decent, but not far enough. 12.5″ in this game isn’t even longer than most guns can fire. He can get all the way to 15″, which is still bad, but it requires him to have a model alive and within 9″ to do it, and I can’t seem to keep them alive. I’ve been told I commit them to early.
He does bring a single facet to the game that I overlooked early on, and had to have someone point it out to me. He does bring perfect balance to some 18 models on the board. While it might not seem like a significant contribution, I have found that the Bloodrunners have some portion of it come up almost every activation. Immune to CRA/CMA, Backstrikes not mattering, Being able to Stand for free and, most importantly, Immunity to free strikes. Being able to position myself to be able to take the best advantage of Shadow Step and Veteran Leader can make all the difference. Not that I made more than a single Vet. Leader attack the whole game.
Lastly, I am finally warming up to the Croak Raiders. In each of the three games they’ve done things significant enough for me to be happy with their performance. The big revelation was trying to be as far away as possible from your target while still being able to shoot. I’m working on eyeballing the distances and I have come up to close every time, but eventually, I’m going to be standing at 10″ from my target and feeling pretty slick about it.
As always, thank you for reading! I’ve made commenting quick and painless, so if you want to share your thoughts with me, should be an extremely simple task.
4 Comments
Craig Fleming
Hey hey, commenting is way better! I’m logged in automatically!
Tionas
Awesome! Thanks for the heads up. I changed over to Disqus, like you’d mentioned. Seems good!
Bradley
Have you tried eMorghoul with the archidon?
Tionas
I don’t think I did. Just prior to abandoning him, however, I think I came to the conclusion that if I was to run him again, he would definitely have one.