Skorne Chronicles, Vol 15
To See the Void
My trip with Mordikaar started back when he was released. His rules were sweet in metamophosis, and there was a ton of hype for him to be released. Until MK II beta was announced, from what I remember, weeks later. At that point, with an unreleased model and a spell list guaranteed to change – Manifest Void was awesome: While in Mordikaars control area, enemy warbeasts cannot be forced to use animi, and enemy caster must spend one additional focus or fury point to cast or upkeep spells. Non-Skorne models cannot gain soul tokens for models destryed while within Mordikaars control area. Manifest Void lasts one round. Cost: 2 AOE CTRL – He didn’t see much play. Then, when the field test went out, he had a few different changes, mixing up spells between Zaal and himself (did you know that he had a bad version of revive and Zaal had Hollow?) including giving him Lamentation before ultimately taking it away, which made him a little less of a draw for me.
I gave him three games in early 2012, didn’t really like him compared to Xerxis, and moved on. However, coming back to him has been a profoundly inspiring event. He is, when he can get rolling, among the most fun and awesome casters to play. He has a suite of abilities unlike many other casters, even in Cryx and Skorne.
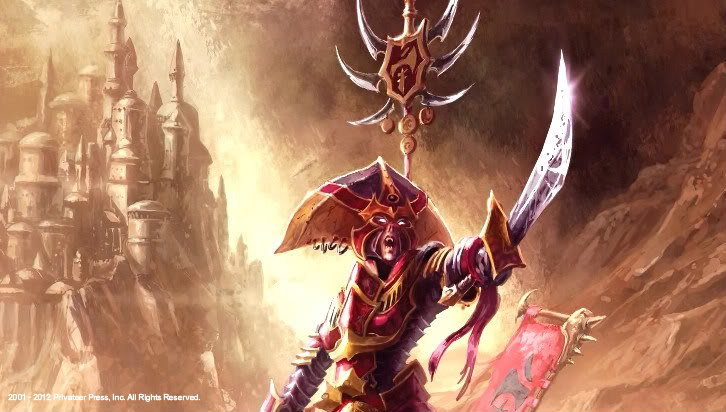
Mordikaar
His stats are pretty bland, so I won’t go over them, other than to say he has a very bad defense (14) has a pretty solid speed (6) and a pretty solid RAT (6). His fury of 7 is solid for a caster type/
His spells, though, are completely awesome, though they do have some slight skornergy built in.
- Revive – This is a simple, if expensive, 3 FURY spell that returns a destroyed model to play. It has caveats that seem strict – Within Control and 3″ of a model in the unit and within formation – However, because this spell brings back one model at a time, it can be used to chain models into interesting places by placing each model within 3″ of a newly revived mode.
- Hollow – This spell is both simple and complicated, netting a chosen unit a few simple buffs (Undead and tough) while netting Mordikaar a solid bonus (souls for fury). What is key here is that his focus stat of seven allows him to manipulate this in an extremely favorable way.
- Say, for instance, you have a unit of Hollow Troopers. With revive, above, if exactly three die, you can return exactly three to play, upkeeping hollow and having 0 fury. Two models can die, and you can return two two play, upkeep hollow, and camp 2. More than that die, and you just start popping as many back into place as you can, keeping the attrition game going in your favor.
- This is also useful for getting excellent placement for Berserk. get great placement for Keltarii to push deep, and get great placement for Arcuarii Charges.
- Ghost Walk – Often, getting jammed is Skornes worst enemy. They don’t tend to have the volume of attacks to break through it quickly, and have a hard time maneuvering swiftly. Instead, this lets them swiftly disengage and pull through the opposing line in order to take down the enemy in waves.
- Essence Blast – This is a key spell, as he has no other offensive potential other than his gun. This spell requires a living model (so, no hollow) to be in good position to shoot a spray off onto some targets. Often, this means that you drop hollow, activate a unit, essence blast once, and then recast hollow. Unless your going for the assassination with 15 fury, then you just send in as many models as you can and blow up the caster.
Each of these spells, seemly unrelated, give the army an extremely fun, rebounding quality that enables it to get models where it wants, how it wants, to do what it wants. Its a very powerful feeling that even some of the best Cryx casters don’t have.
Adding to that is his feat,Void Wind, which is crazy-good. It looks so bland and unassuming on paper, especially if your used to the Cryx average def of 12, but with the curve hitting 13 in skorne, +3 defense is extremely useful. However, it is not useful in the standard ways that you would expect, and can be counter-productive if your timid.
Most would think that they would get some sort of use out of the feat, but that’s just not the truth. Instead, the work that emanates from the feat is positioning and board presence. Instead of attacking, many players will simply jam into you, creating an opportunity for you to try and gain ground by getting a reactive alpha strike.
I cannot stress this enough: A reactive alpha strike and the feat as a whole will be wasted if you are not significantly in the presence of Zones, Objectives and Flags. Instead, if you are not in a position of threatening strength, you will be ceeding the ground to your opponent as they double down on their position and re-enforce their hold over the scenario. Do not be afraid to commit extremely hard to a zone in order to claim it with the help of the feat. Also, if you are going second, you might feel that your first turn will automatically be the feat, but this is not always so. You need to make sure that your in presence and command of the zones before popping your feat to make sure you can pull back from the edge. Instead of commiting to a turn 1 feat, consider what models will die, if they are expendable (hollow) and returnable (revive) and if their position can be stabilized with back line models.
Mordikaar, playing him less than even a dozen times now, feels like one of the casters I can just play forever. He’s reactive, he’s offensive, he has the tools to get the job done, and he makes damn sure that his opponent plays his game.
My List
In many lists, Each component has a role, and in some lists, its two or even more. I’ve stolen, for the most part, my list from the internet, but it makes a ton of sense.
Beasts
- Tiberion is the Rock on which the enemy breaks. Under the feat, he is defense 14 and arm 21, something unlikely to break under pressure. His inability to move and the shield guard ability allow him to be able to play a defensive piece due to his speed. The POW 18(20) Tetusubo allows him to get extreme work done when the time, ineveitably, calls for it.
- Mordikaar often follows the Cetratii around to keep them alive and because they are tough as nails. Keeping Tiberion around, lurking behind the Cetratii presents a very large problem.
- Cyclops Shaman is the scalpel to Tiberions hammer. He is invaluable in almost every list I play him in, and I have never been sad to have him. Spirit Blade is a valuable dispel, Primal Magic allows him to save Mordikaar some fury, and his evil eye is extremely potent. Combined with the Raiders Snipe ability and the Extoller Soulwardens Guidance, he can remove enemy models with stealth behind colossals from 20″ away. Eiryss, Gorman, Saxon Orrick, Blackbane, Blood Hag and even the Kayazy Underboss all have to watch out for the Evil Eye.
- The Cyclpos Raider is the compliment to the Shaman, and his partner in crime when it comes to shooting. Often, his targets are the soft underbelly that the Shaman is targeting, and will either allow for another bite at the apple, or give the Shaman snipe in order to allow boosted damage. His aiming steath-ignoring range of 14″ is nothing to sneeze at either.
Solos
- Extoller Soulward is the linchpin to the shaman-Raider combo. He enables whichever model to do whichever job is necessary at the time. Stealthed model that is hiding behind a rock? Shaman. Model Hiding behind a forest that the Shaman couldn’t get to? Raider. Stealth and not in range of standing still for the Raider? Oh yeah. Often, she’ll even get a shot of her own off on a prime target – Caster or big ol’ beasty, with a well placed, soul-boosted shot. Also, fear not when it comes to stealing souls from Hollow, as they don’t generate souls for her to steal, they just show up on Mordikaar.
- Agonizer is one of the best solos in Skorne! While it seems, on the very surface, that he’d be more useful against hordes with a pair of options, the ability to completely shut down a colossal for a turn or longer is completely clutch. Honestly, you just apply him differently. Most often, I use him to deliver Tiberion against a Warmachine army, but I use him to protect Tiberion and Cetratii against Warbeasts in hordes. No matter how you slice it, he’s a great 2 point solo. Just remember to top him off turn 1!
Units
- Cetratii are the Anvil on which the enemy are crushed. They are sturdy, dense and murderous, and their cost justifies every penny. Don’t let their MAT of 7 fool you, though, they will miss as many attacks as they hit, and they don’t have many to spare. With Void Wind to bolster them on the initial assault, they will most often get where they are going. 16 Armor and 8 boxes does a lot toward making sure they survive until they need to die. They are also fantastic Revive Targets if they do manage to die, and returning 2 of them back to combat is never a terrible play. Their Attachment Vorkesh really helps against some of the nastier gameplayers – Kreuger 2, Haley 2 and Cryx of all types. Combined with Banishing Ward and Hollow, and many times your opponent doesn’t really have a good place to place those spells.
- Make sure to commit almost all of them when you do. Having the back rank toe in the zone makes the whole unit a priority, where as if only a few toe the zone, the opponent will maximize their potential attacks into those models to root them out.
- When the time comes, Charge. You won’t always have that clarity during the game, but every so often, it comes up. That extra distance and damage die is sometimes everything you need to win the game.
- Incindarii are one of the units I love the most, but also the one that I see in many less lists. Often its either Swamp Gobbers and Blood Runners or some sort of advance element. However, these models make impeccable Revive targets. Getting 3″ of Aiming fire bombs into the back of unsuspecting targets is a fantastic use of three fury! In addition, they have 8 wounds to start off with and can be a pain to take down. Reviving them with only one wound gives the opponent a decision: go for the sure kill, the one he brought back for trivial resources, or go for the model that’s at full health that you may fail to kill. Ghost Walk is one of the best spells for these guys, as they are normally engaged as fast as possible, and being able to pull them out of harms way and into a firing lane is excellent.
- Finally Keltarii/Nihlators. While they serve distinctly different battlefield roles, they serve the same purpose to the Mordikaar player. Both will jam under Hollow and threaten a brutal reprisal both of they are, and if they are not, dealt with. Nihlators with a preponderance of violence unmatched in the Skorne Arsenal, and the Keltarii with scalpeling out all the models you know and love from the backfield. Nihlators are extremely useful against Khador, Cryx and Retribution, where Keltarii are amazing against Protectorate, Trollkin and the Skorne Mirror. Both have valid uses. Personally, I love the Keltarii, because they allow me to wiggle around other models without needing to use ghost walk, and with the CRA they are able to threaten higher MAT attacks than the Nihlators who are sometimes left swinging for the fences.
Mordikaar has been one of the best, unexpected joys of bringing Skorne out. I’ll be bringing Him and Rasheth to the ECR this weekend, and if I get into masters as the Byebreaker, then I might be able to drop him onto the table. I’ve got about 2 more games before I hang him up for my next caster in the Skorne Circuit. Speaking of which, Xerxis2’s base finally came in, so I can pin, glue and get ready to paint him in July!
Thanks for reading, and feel free to comment!